Prepare message model specification
Wizard step 1
1.1 Select source specification or sample data (Ontology, JSON Schema, or CSV)
The starting point for creating a message model is a source specification, a shared conceptual model that holds the known concepts and relations. Semantic Treehouse supports importing ontologies and has preliminary support of JSON Schema specifications. As an alternative, users can opt to take as starting point a sample of their own data instead. This is generally a simpler way since it doesn't require the user to familiarize themselves with a shared conceptual model, but they lose the benefit of ensuring interoperability from the start.
1.1.1 Option A: Ontologies (OWL, RDFS+SHACL)
Ontologies are globally shared, conceptual models that describe a specific domain that can be re-used and can be used in combination with other ontologies. The idea of the wizard is that you should select the ontologies you need, before you start specifying your message. Because of the open nature of ontologies it is very likely that already an ontology exists for your specific problem domain, luckily.
Ontologies can be expressed as RDFS, OWL or SHACL specifications. Those specifications need to be registered and imported into Semantic Treehouse first. See Manage specifications and Ontologies.
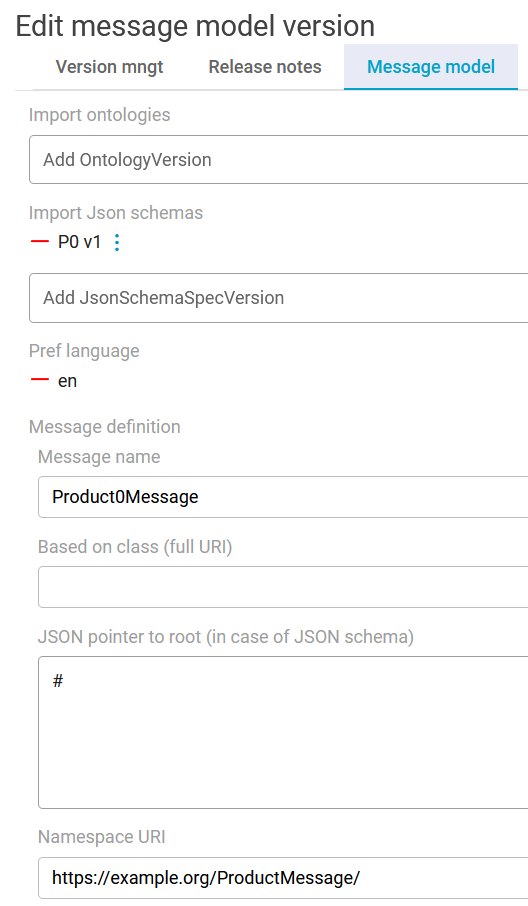
1.1.2 Option B: JSON Schema import
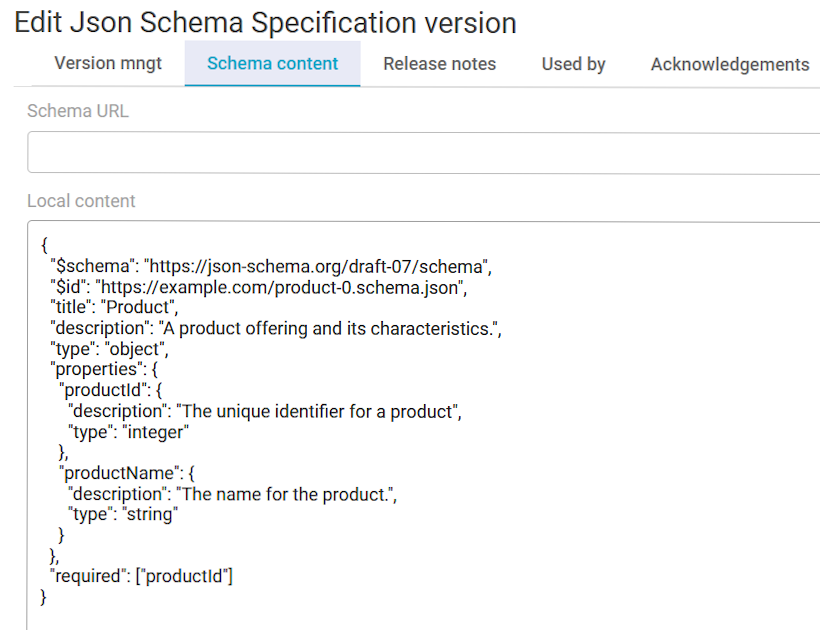
If your data model of choice is not expressed as an ontology but JSON Schema, you can use the wizard as well to create a new message model based on that. The main supported features and limitations are described in the JSON Schema Input section, as well as an example schema. You can choose to load the text of the json schema in the local content field, as in the following image.
Alternatively, you can leave the local content field empty and add a schema URL to the remote location of the json schema specification. That location should be openly accessible for STH to recognize it, of course. Local Content is the preferred way since remote files may change location or be altered. So filling in a Schema URL is not necessary when a local content schema is provided.
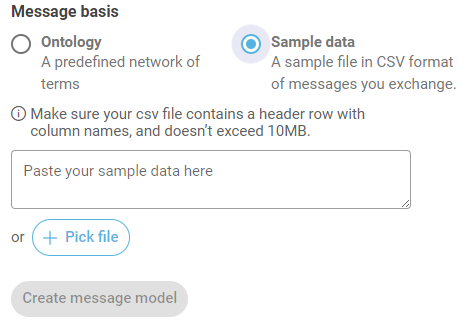
1.1.3 Option C: Sample Data Import
Semantic Treehouse also allows their users to create a vocabulary using sample data in a CSV file (more file formats will be supported in the future). Similar as the above inputs, this concept is to upload sample data before specifying your own message model. Semantic Treehouse considers the column names in the CSV file as element names in the generated message model. The initial vocabulary that will be generated can then be further developed by the community itself. We refer to this as the bottom-up approach, wherein we initiate the process from the data and from there encourage vocabulary reuse.
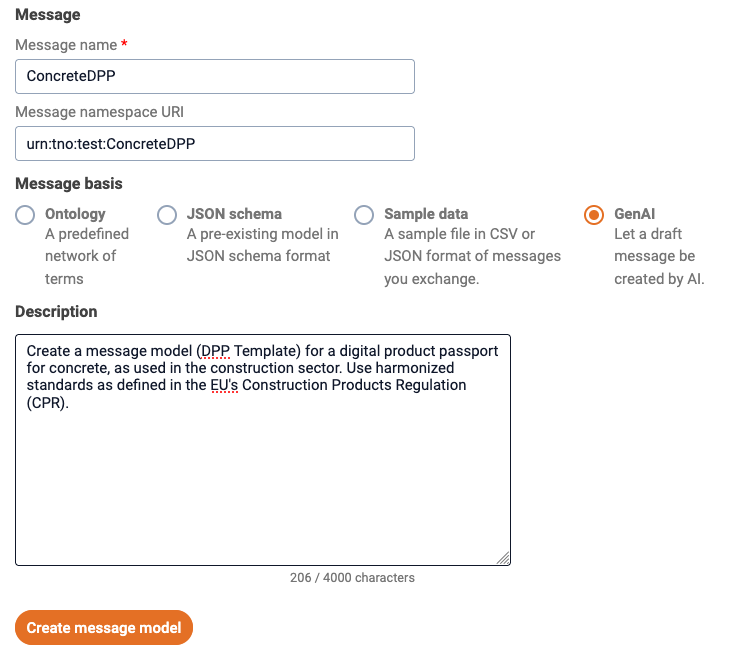
1.1.4 Option D: Create draft with AI
The wizard can also create a draft message model for you. This is useful if you want to start with a predefined message model and then modify it to fit your needs. The wizard will create a draft message model based on the ontologies that you have imported. You can then modify the draft message model to fit your needs.
1.2.1 Select root class for ontology-based message specification
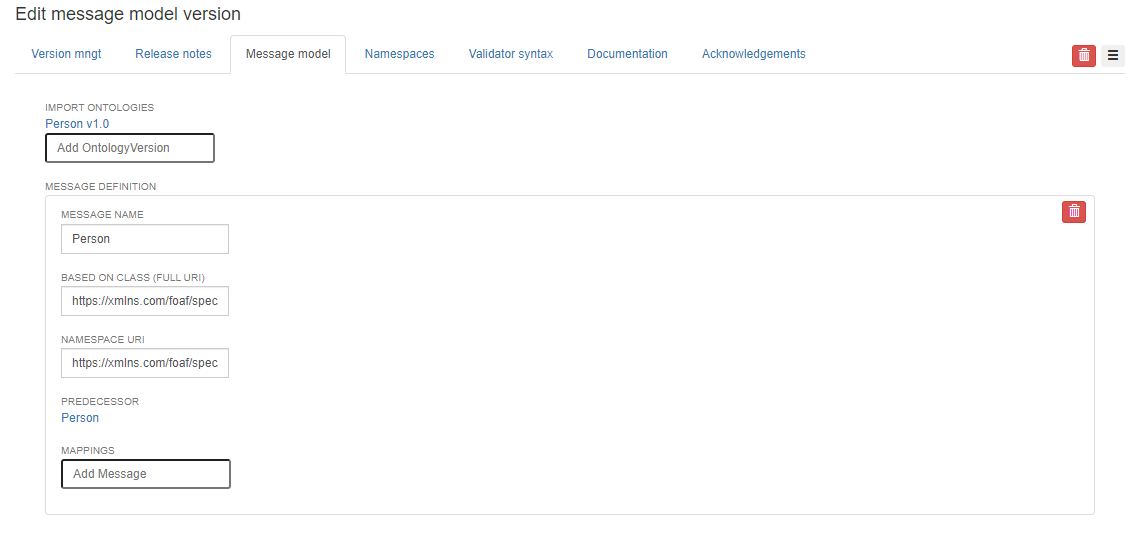
The wizard requires you to select a root class for your message model. This root class points to a class in one of the registered ontologies, and it provides the starting point for the further filling in of your message model. The Wizard then has a starting point for traversing the 'knowledge graph', that is the ontology. The root class can be any class from the imported ontologies. Find the class in the ontology that provides a logical starting point for the message tree. For example, for a message model about personal data, we could choose:
foaf:Person a owl:Class .
Determine the full URI and the namespace URI of root class. For example:
http://xmlns.com/foaf/0.1/Person
This is the first step of creating a message model with a selected root class named Person. This class and the imported ontologies determine the possible sub elements that can be selected as part of the message model. More information about the message tree is given in step 2.
An overview of preparing the message model in Semantic Treehouse is depicted below:
1.2.2 Select root class for JSON Schema-based message specifications
In case of json schema, the root class is selected using a json pointer. We use the '#' to mark the root of the json schema document and this is the default option. If instead, the Message model should start from a different place in the json schema, we use JSON pointer notation to point to a sub-schema.
1.3 Adding namespaces and namespace prefixes
All messages, ontologies and elements within these live in a namespace, this makes them globally referencable. The default namespace of the new message model is something you can specify yourself. The ontologies you use will have their own base namespace, but often you will want your own namespace for your messages. If you overwrite a namespace and element name (and change the content), this breaks the global uniqueness principle for this element.
Semantic Treehouse asks you to provide a default namespace. How is the default namespace used? For both the XSD and example generator, the default namespace of the message specification is registered as xmlns attribute. That attribute is required to be able to specify the namespace of elements without a prefix, further on in the document. If default namespace is https://ontology.tno.nl/messagemodels/productcatalogue#, then the xml element <ProductCatalogue> is interpreted as https://ontology.tno.nl/messagemodels/productcatalogue#ProductCatalogue.
Additional prefixes allow you to abbreviate the full URIs, if you use some namespaces often. The wizard allows you to add prefixes for often used namespaces, so you should specify these in the appropriate tab of Step 1. If no prefix is supplied for a namespace used, the generated output of the wizard may generate own namespace prefixes like ns0, ns1, etc.
Example of ontologies, root class and namespaces
Let's look at an example where we want to make a custom invoice message, specifically an invoice response message. We scour the internet and find the 'Organisation.com Invoice-Process ontology'. Version 1.0 seems to be most used by other companies, so we'll take that.
So we import this ontology: https://ontology.organisation.com/invoice-process/1.0/.
Using an ontology exploration tool, such as WebVOWL we look through this ontology for a good starting point. It seems, there is a class called InvoiceResponse, that provides the perfect starting point for this new message model.
Next, we'll choose a namespace for our new message model. Since we're in charge of this message model we'll put it in our company's namespace https://my-company.com. Because there's also a web-site running there, we'll use a subdomain https://messages.my-company.com/ where we'll place all of our message models. We choose to include a version in the URI so we can distinguish different versions, so this'll make the total message namespace https://messages.my-company.com/invoice-response/0.1/ and we enter this in the wizard.
Next, we'll add the namespace and a prefix for our imported ontology, so that all references to the source ontology classes and properties can be abbreviated conveniently by using a shortcut. Without them, aren't all these URIs so long to read? So we'll add prefix ip as shortcut for https://ontology.organisation.com/invoice-process/1.0/. In this way, we can abbreviate the root class https://ontology.organisation.com/invoice-process/1.0/InvoiceResponse as simply ip:InvoiceResponse. Note that some common default prefixes, such as xs for XML schema, are automatically applied.
Copy from earlier version
The Wizard provides the functionality to copy a message model specification from an earlier version to make a new version. Note that when doing this, the imported ontologies and the root class of the new message model should be identical to the source message model. More about this feature is explained here.